| ←Chapter 4 | Chapter 5 | Chapter 6→ |
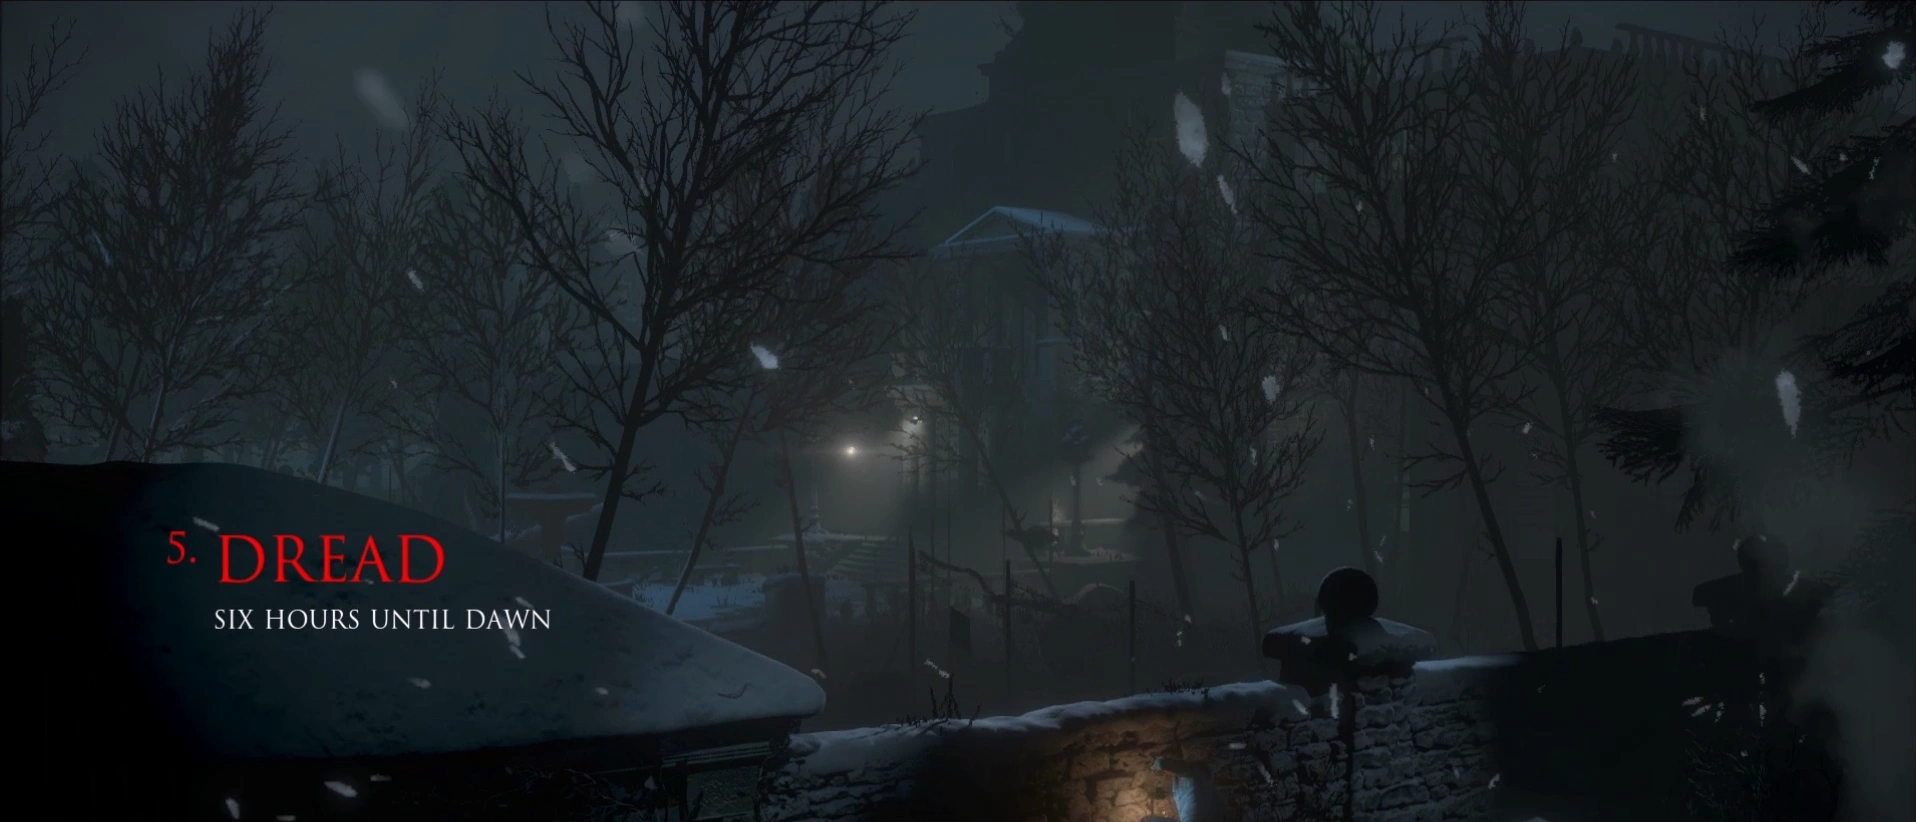
Chapter 5, "Dread" / "Prey", takes place roughly before six hours until dawn.
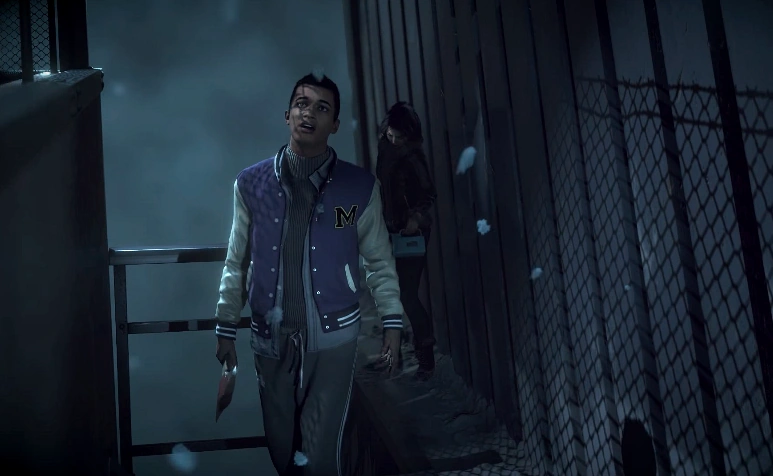
The player takes control of Mike as he ventures around the Sanatorium, Matt, as he and Emily make their way to go get help at the fire tower, and Sam as she is being chased in the lodge by the Psycho.
01:03
Mike will detect The Stranger and two wolves entering the Sanatorium, and will follow them inside. Upon entering, he'll notice the Stranger giving the two wolves a bone. He'll try to open the door as they leave, only to find it locked. Mike will find his way around the Sanatorium and discover a machete. He takes it with him, putting it on his belt.
As Mike continues to explore, he will walk through a morgue and open up a body drawer. He will search through a corpse and find a security pass to enter through the door. Mike may get his fingers caught in a bear trap, leading him to either having to amputate his fingers, or using the machete to open the bear trap. This will break the machete as a result.
Mike will make his way into the next room and a wolf will scare Mike, chasing him up a flight of stairs. Mike manages to get away, closing the door on the wolf before it can catch up to him.
As Mike continues his search through the Sanatorium, he will encounter the wolf again. Mike finds a miners jacket and puts it on. He also acquires a gun. Mike may find a bone and use it in an attempt to befriend the wolf.
As Mike descends down the Sanatorium's dungeon, he'll find a locked door and will move a barrel to shoot it. After Mike shoots it, he'll realize that he shot near a flammable liquid. Mike will take cover as it explodes.
Collectibles
Clues
- Administration Notes - Mike can find a letter regarding the miners in the Admin office atop the hearth by the main entrance.
- Broken Camera - Mike is able to find a camera with a broken lens.
- Medical Notes - Inside the admin area, Mike can find a medical report.
- Clocking-In-Cards - Mike can find a batch of clock-in cards in a safe.
- Mine Rescue Photo - Before Mike walks towards the stairs in the big window area, he can find a picture of the 12 surviving miners at the right.
- Old Newspaper - On an office desk, Mike can find a newspaper about a reporter being banned from the Blackwood Sanatorium.
- Restraining Chair - Mike is able to find a mysterious restraining chair with dried blood on it.
- Telegram About Miners - Mike will find this telegram in the room containing the machete.
- Name Tag - Mike is able to find a name tag in a drawer.
- Strange Skull - Mike can find a disfigured skull on a shelf.
- Death Certificate - A death certificate of a worker in the Sanatorium, which Mike is able to discover.
- Cigar Box - Mike can find a cigar box in the center of the room when he enters the Chapel.
- Clippings Wall - Mike can find this clue on the right side of the room in the Chapel, close to the gun and jacket.
Totems
Original Game
- Fortune Totem #2 - Mike can find Fortune Totem #2 outside the gate found heading left from the starting point instead of right, showing Matt backing away from a banging door.
- Loss Totem #4 - Mike can find Loss Totem #4 inside the Sanatorium cellar if he turns left at the shaft area before getting the barrels to go up, showing Matt's face getting bashed in.
- Death Totem #3 - In the same area of the Mine Rescue Photo, before walking down the stairs, turn left and Mike can find Death Totem #3 showing himself lighting up a lighter, which causes an explosion.
Remake
- Danger Totem #2 - Danger Totem #2 can be found by Mike on the small path to the right of the fountain. It foretells Sam entering the lodge's cinema room as an unknown man follows her.
- Guidance Totem #5 - Guidance Totem #5 can be found by Mike after he acquires the machete, towards the left wall. The premonition foretells Chris holding a gun to his own head.
01:05
The Psycho will be seen spying on the lodge through T.V. monitors, locking one of the gates that Matt and Emily had just went through.
Matt can press the button to find the gate inexplicably locked behind them. Emily and Matt will express disbelief over Josh's death, and Emily will claim that they should've checked the shed to see if it was really true.
Once they arrive at the cable car station, Matt will find an axe stuck on the door. Emily will find the door is locked, and tells Matt to bust the door down with the axe, but Matt will see a narrow window that Emily could fit through.
He can either agree with Emily and smash the door, or he can help Emily through the window.
Matt can choose to break down the door immediately, but can also be forced to do so if Emily refuses his suggestion to go through the window.
If Emily does accept (depending on if Matt sided with her during the argument with Jessica), she will go through the window and enter the cable car station. Once inside, she will find her way through the darkness to the door and unlock it. Emily will praise Matt unless he's not by the door by the time she exits, in which she'll scold him for wandering off.
Matt and Emily will enter the station only to find it to be ransacked, with the cable car unreachable. As Matt looks around, he will find a wall that says "DIE" in red paint and a map that shows a fire tower in close range. He also discovers that they will need keys in order to activate the cable car. Emily insists that they could go to the fire tower to find a radio and call for help. Here, Matt will have an option to agree or disagree with Emily.
Depending on Emily and Matt's relationship status, Emily will react differently if Matt agrees or disagrees.
If he agrees, she will either mock him and say it's a "great idea" or be relieved that he is finally learning to play by the rules.
If he disagrees, she will either be critical and call him a pussy, or try to reason with him.
Regardless of Matt's choice, they will then make their way out of the cable car station around the edge to the other side. Emily, with Matt's help, will pull down a ladder and find a flashlight at the bottom. They both will start making their way around the edge, only to see that Emily might fall on a slippery ice patch.
If Matt catches Emily, she will thank him and suggest that he go first. Matt will reassure Emily that she won't fall until the end of the edge.
If he fails, he will have to pull her back up or not help her up at all. She will go first the rest of the way in silence. Once they get to the edge, she will be irritated that Matt did not help her.
As they continue their way to the fire tower, Emily and Matt discuss a Plan B if the radio doesn't work. They will then find themselves at the edge of the cliff where Hannah and Beth fell one year ago. After finding a sign broken in half saying "Danger: Cliff", they will go back, only to find themselves surrounded by a herd of angry elk.
Collectibles
Clues
- Axe - Matt always finds an axe stuck in the door to the cable car station.
- Beth's Phone - Matt can find Beth's cellphone by turning left to the bridge instead of heading to the cliff on the right.
Totems
Original Game
- Death Totem #2 - Instead of heading to the cable car station, turn right into the open area and Matt can find Death Totem #2 near the bushes, showing himself falling to his death.
- Guidance Totem #5 - Right after leaving the cable car station with Emily, Matt can find Guidance Totem #5 next to the trail, showing Emily handing him a flare gun.
- Fortune Totem #3 - Matt can find Fortune Totem #3 along the way to the cliff, showing Ashley opening a door to let Chris in.
Remake
- Danger Totem #4 - Danger Totem #4 can be found by Matt to the right of the upper cable car station, behind the fence. The premonition foretells Emily trying to reach for Matt's hand.
- Guidance Totem #6 - Guidance Totem #6 can be found by Matt in the junk pile right after leaving the upper cable car station. It foretells Mike barricading a door with a locker.
01:11
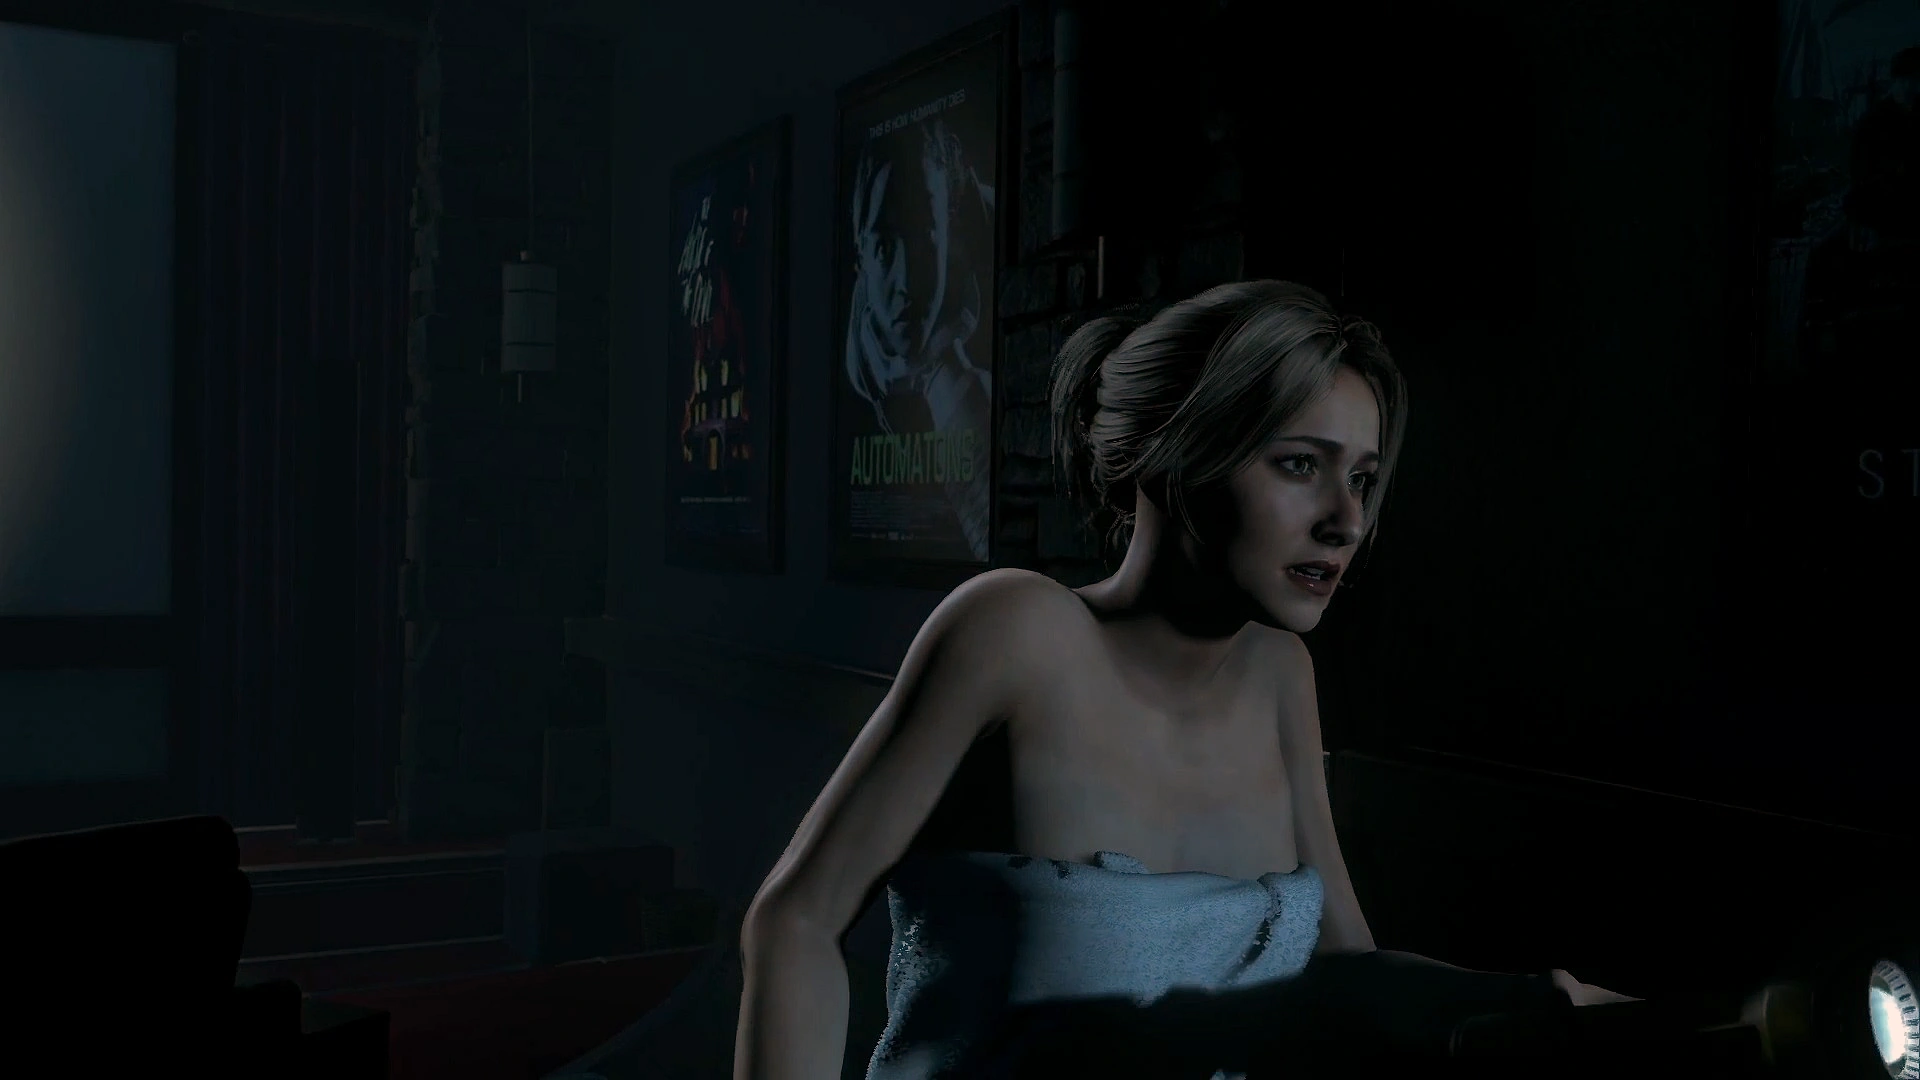
Sam is relaxing in the lodge's bath while listening to classical music, unaware of The Psycho behind her. It is only when Sam's candles snuffs out after the Psycho closes the door, that she notices something is wrong. She suspects that her friends are playing a prank on her, and her suspicions are further heightened when she sees that the only article of clothing she has left is a single sock. Sam walks downstairs, following balloons with directional arrows on them.
As she reaches the cinema room, she is played a video of Josh's murder on the screen. She also sees a video of herself getting out of the bath with the Psycho telling her that these might be the last happy moments of her life in the background.
He gives her a ten second warning, during which she pleads him to stop, and then he prematurely breaks down the door to the room she's in. Suddenly the Psycho appears and starts chasing Sam, depending on the player's fears he will either carry a sleeping gas machine or a sedative syringe.
Sam can choose to throw the vase or run.
Choices
If Sam grabs the vase she can complete a QTE to throw it at the psycho.
- If Sam throws the vase, she will launch it the psycho's head and run off.
- If Sam does nothing she will drop the vase and run off.
If Sam runs, she simply escapes to the next room.
If Sam fails to make a choice, the psycho catches up to her and captures her.
If Sam hasn't been caught yet, she progresses into the next room. She can choose to hide underneath the bed in the next room or running downstairs.
Choices
If Sam hides, she must diffuse her flashlight immediately. She is then given the option to run or stay still. If she stays still and does not kick the Psycho or she fails to kick him when prompted after she grabs the bed post, Sam is caught by The Psycho.
Sam hops over the bed and runs down the set of staircase that Josh previously warned her about and into the boiler room. She can again choose to run or hide.
Sam will once again be faced with another dilemma if she has not yet been caught.
Sam turns off her flashlight and then must remain still to avoid detection by The Psycho. He tells Sam that she can't hide and Sam is given the option to stay still or run. Staying still will cause Sam to duck down until The Psycho starts releasing gas from his canister and banging it around or waving the needle. She has one last chance to run, which she can then whack him with the bat if she interacted with it before. Even if Sam stays hidden, she can still hit the Psycho with the bat and escape. She can escape if she does any choice, as long as she has the bat if she hides here.
Sam runs into the next room and realizes that the door's handle is on top of the cabinet instead of connected to the door. She can choose to force her way into the room or pull the cabinet down to grab the handle. Either way she will advance into the next room.
Sam realizes that the door in front of her has no handle. She will be presented with two choices.
If Sam pulls the shelf down, the door handle will fall off the top and she will pick it up. Sam jams the handle into the door and escapes just as The Psycho is about to grab her.
Sam will slam her shoulder against the door a few times and it will open just enough for her to slip in and shut the door.
Sam discovers that she is in the lodge's laundry room. She can either go to the door on her left, which will result in her getting captured, or go to the door in front of her, into the Old Hotel.
If she enters the Old Hotel, she stumbles down and her head wound will reopen if Chris shot the squirrel in the first chapter. As she walks down a long corridor, she can choose to hide or run ahead.
Sam will jump down below a small elevator shaft and must turn off her flashlight. The Psycho walks to the ledge where she jumped to survey the room. If she remains still enough, The Psycho will leave and Sam will survive her capture. If she was stunned before, The Psycho will notice Sam and capture her.
Running will cause The Psycho to pop out and grab her. He will tell her he's sorry as he either injects her with a substance from a needle or knocks her out with gas.
Collectibles
Clues
- Business Card - At the front door of the lodge (where Emily and Matt went to find Emily's bag), turn right, and Sam can find a business card.
- Beach Photo - On the table where Josh's flashlight had been, Sam can find a photo of Josh and his sisters on the beach (if Chris or Sam hadn't found it in Chapter 2).
- Prom Night Photo - Sam can find a picture of herself, Hannah, Mike and Emily during their senior prom (if Chris or Sam hadn't found it in Chapter 2).
- Answerphone Message - Sam can find a message from the sheriff about an escaped convict on an answerphone, located in the dining room (if Chris or Sam hadn't found it in Chapter 2).
- Film Trophy - Sam can find a trophy for a movie Josh's dad directed, to the right of the hallway that leads to the bathroom and Hannah's bedroom (if Chris or Sam hadn't found it in Chapter 2).
Totems
Remake
- Guidance Totem #2 - Guidance Totem #2 can be found by Sam to the left outside of the bathroom (if Chris or Sam hadn't found it in Chapter 2).
Trivia
- In the PS4 alpha version of the game, the segment's starting time was 11:26 PM.[1]
- In the PS4 beta version of the game, the segment's starting time was 11:21 PM.[2]
References
Sixth Therapy Session
Dr. Hill appears only briefly, standing at the window of his office, which now looks refurbished and in a surprisingly good state. Depending on whether Sam was captured, he either remarks that everything is going according to plan or expresses doubt about the outcome. He repeats parts of his speech from the Prologue, reflecting on the progress made during the previous "sessions," while adding the note that the player's fears are being used against the survivors, concluding by asking if it was all worth it. As he takes out and examines the picture from the Prologue in one of his folders, he jumps back in surprise upon seeing The Psycho in front of him.
This session reveals that the patient in the previous "therapy sessions" has always been the Psycho.
Transcript
View the chapter's transcript here.
View the therapy session's transcript here.
Trivia
- The way to obtain title for this chapter is unknown.
- Chapter 5 was the first gameplay shown of Until Dawn and was featured at Gamescom 2014.
- Chapter 5 only features half of the 8 protagonists appearing, the least of any chapter.
- This chapter has a total of 26 collectibles able to be found.
- Chapter 5 has the highest number of collectibles.
- In the remake, there are 25 collectibles able to be found in Chapter 5.
- The music Sam is listening to in the bath is Cello Suite No.1 in G Major BWV 1007 by Johann Sebastian Bach.
- Depending on the player's fears, the Psycho will either carry a sleeping gas canister or a syringe.